Difference between revisions of "1-Wire Hub v2"
From PhotoVoltaic Logger new generation
m |
m |
||
| Line 2: | Line 2: | ||
Here comes the Version 2 of my 1-Wire Hub. | Here comes the Version 2 of my 1-Wire Hub. | ||
| − | The basics are the same as in [[1-Wire Hub|Version 1]] | + | The basics are the same as in [[1-Wire Hub|Version 1]], see there for wiring concept. |
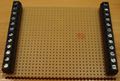
For this one I use a case for a cap rail like the following with 12 connectors on each side. | For this one I use a case for a cap rail like the following with 12 connectors on each side. | ||
| Line 30: | Line 30: | ||
File:1WireHub2-4.jpg|Caption1 | File:1WireHub2-4.jpg|Caption1 | ||
File:1WireHub2-5.jpg|Caption1 | File:1WireHub2-5.jpg|Caption1 | ||
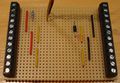
| − | File:1WireHub2-6.jpg|Mounted with 2 sensors connected. All not used D+ & D- are bridged! | + | File:1WireHub2-6.jpg|Mounted with 2 sensors connected.<br />All not used D+ & D- are bridged! |
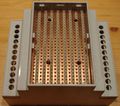
| − | File:1WireHub2-7.jpg| | + | File:1WireHub2-7.jpg|Finished |
</gallery> | </gallery> | ||
Revision as of 07:39, 1 September 2014
Here comes the Version 2 of my 1-Wire Hub.
The basics are the same as in Version 1, see there for wiring concept.
For this one I use a case for a cap rail like the following with 12 connectors on each side.

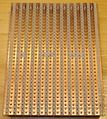
Therefor the layout was adjusted like this:

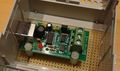
Furthermore I use a USB to 1-Wire adapter like this.

(It is from DAEStore from Bulgaria on eBay which make good parts for 1-Wire networks)
Here are some pictures to get an impression.
Caption1
Caption1
Caption1
Caption1
Caption1
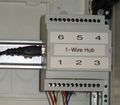
Mounted with 2 sensors connected.
All not used D+ & D- are bridged!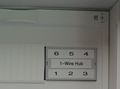
Finished


